
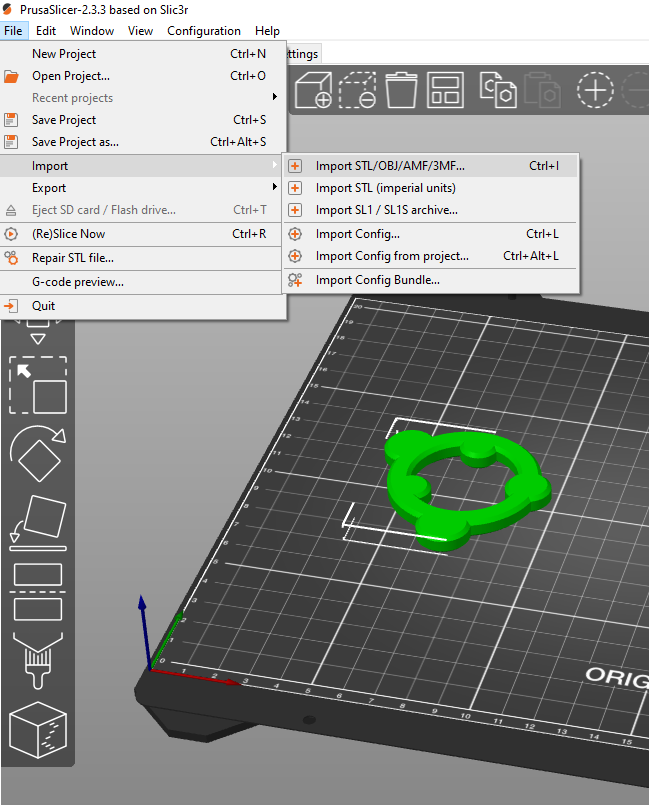
In order to use the 3D printers, you need to be a McGill Physics student and get certified to print by either Roman Akhmetshyn or Robert Turner.
Open training hours with Roman:
Wednesdays: 14h00 - 17h00
Thursdays: 10h00 - 13h00
Sign-up for training!
You can find the following relevant documentation below
Gearbox Makerspace User Agreement
Open Hours: m - f; 09h00 - 16h45
Rules and Regulations
- Users must be current students at the McGill Department of Physics.
- Users must complete the appropriate 3D printer orientation session before using the 3D printers. Special permission is required to use the Formlabs Form 2 SLA printer. Contact one of the people listed below.
- For the time being, 3-D printing can only be done using PLA filament.
- Students must not use any equipment for which they have not received training from a qualified instructor.
- After completing training and signing the User Agreement, users will receive an individual account to use the Repetier print server. Users must only print using their own credentials and not share their credentials with anyone else.
- Nothing may be printed that is not appropriate for a university setting or violates McGill's code of conduct.
- Users agree to comply with all laws and regulations applicable to the use of the 3D printer, including copyright and patent infringement regulations.
- Users are responsible for equipment in the room while they are the ones actively logged in.
- No tools, equipment, supplies, materials belonging to the makerspace may be taken out of the room.
- Students agree not to change default settings or paramters on the equipment. If in doubt about a parameter or setting, consider it default and do not change it. Contact the first two personnel on the list below for help.
- Students trained in using the 3-D printers will have card key access to the makerspace during Open Hours, and are only allowed into the makerspace at those times. Access is granted to a user upon swiping their McGill identification card over the card reader next to the door.
- After Hours access (M-F 16h45 - 21h00) is availble on an individual basis to students who actively support the Gearbox community. After Hours access can also be granted for a limited time to individuals for demonstrated research project needs. Anyone accessing the makerspace After Hours must individually swipe their pass cards upon entering the space. After Hours users are not permitted to let anyone enter the room who does not swipe their own access card over the reader.
- The door to the makerspace must remain closed After Hours, except to allow access to the room. If the door is held open, a silent alarm will summon security personnel.
- All successful print jobs must be reported in the online form here.
- Users must monitor their print for the entire duration of the first layer, to ensure that blobs or other errors do not occur.
Printing Etiquette
- Users are responsible for leaving the equipment in at least the same condition as when they found it. Please clean up after yourself and others. We aim to maintain an open space for members of the McGill Physics Department to explore their creativity.
- Users agree that if the equipment becomes damaged, defective, or unsafe, they will immediately contact both of the first two personnel to inform them. They should also leave a clear note explaining the issue on or next to the piece of equipment in question.
- Print jobs taking up to 6 hours long can be printed on first come, first serve basis.
- Long jobs (lasting more than 6 hours) should only be completed on the long job printer, overnight, or on the weekends. If you have questions concerning long print jobs, contact either of the first two personnel.
Contact Personnel
- In case of need, contact either:
- The current TA, whose coordinates will be posted in the makerspace,
- Robert Turner robert.turner@mcgill.ca, Wong 0121, x6356, or
- Thomas Brunner thomas.brunner@mcgill.ca.
Agreement
I have read the User Agreement and agree to follow all rules and regulations of the space. I agree not to abuse the space, the materials, the tools, and printers. I agree to follow all safety protocols. I will not do anything that will harm myself, others, or damage the equipment. I understand that the makerspace is under video surveillance. I agree to have fun and make some cool things and to help others do the same.
For printable copy of user agreement click here.
Prusa Training Manual
This document will outline how to print in our lab using the Prusa I3 Mk2. This guide will give you all the basic information you need to know to get from 3D model to a printed piece.
Converting model to GCODE
This guide starts assuming that you have a 3D model ready to go. You can either design your own part from your favorite CAD software, and export it as an STL, or download a model from a source, such as https://www.thingiverse.com/.
Now that we have our model, we need to convert it into code that the 3D printer knows how to deal with --g-code. G-code is a numerical control programming language that will tell the printer exactly how to move in order to print our piece.
In order to convert this software, we are going to use Pruse Slicer.
-
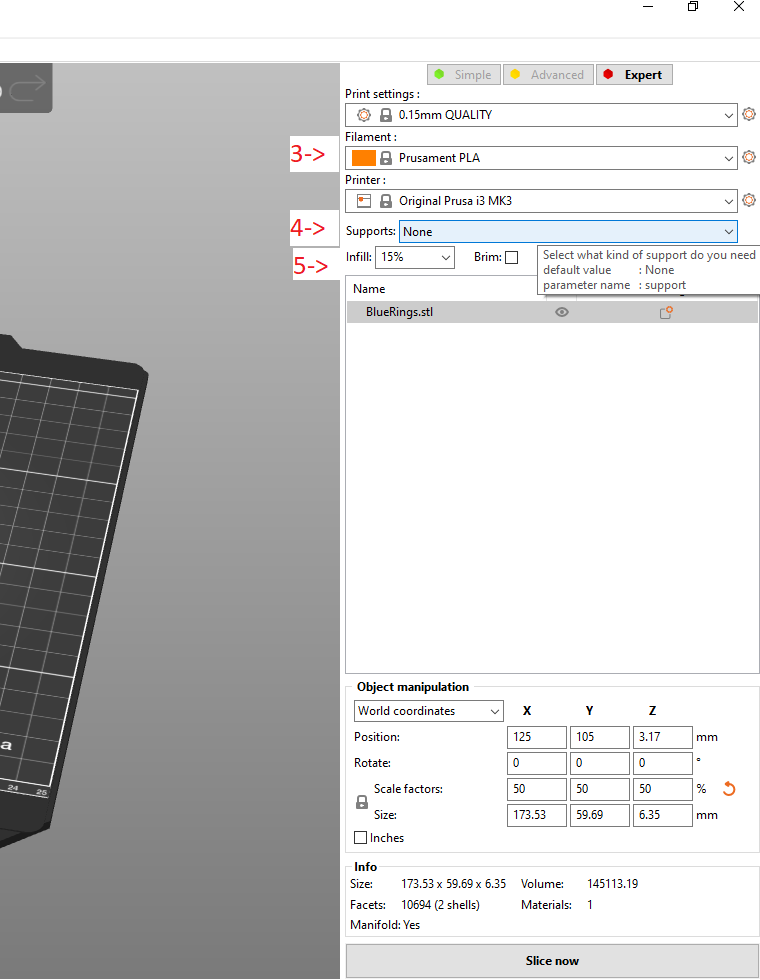
Load the STL file into PrusaSlicer.
- Orient the object into your preferred orientation.
- You can right click and move around different axes.
- Make sure you select the correct printer, check if you are printing on the 4 mm or 6 mm nozel!
- Decide what fill density you want for "solid" volumes of your model.
- 0% is no infill. (Only the outer shell of the model will be printed)
- 100% is fully infilled.
- 15% is a standard infill for most print jobs.
- Decide if you need supports.
- If there are any features that overhang by an angle of more than 45 degrees from vertical, supports are required.
- Select if you want a brim.
- A brim will print a 5mm brim around the layer, which will help with making the print stick to the bed better. This does not consume much time or material, so generally it's advisable.
-
Click "Slice Now".
-
Click "Export G-code to SD Card ", with SD card loaded from 3D Printer.

Printing
- Log onto your account.
- If you don't have an account yet, then you must complete the training with the TA or Robert Turner.
-
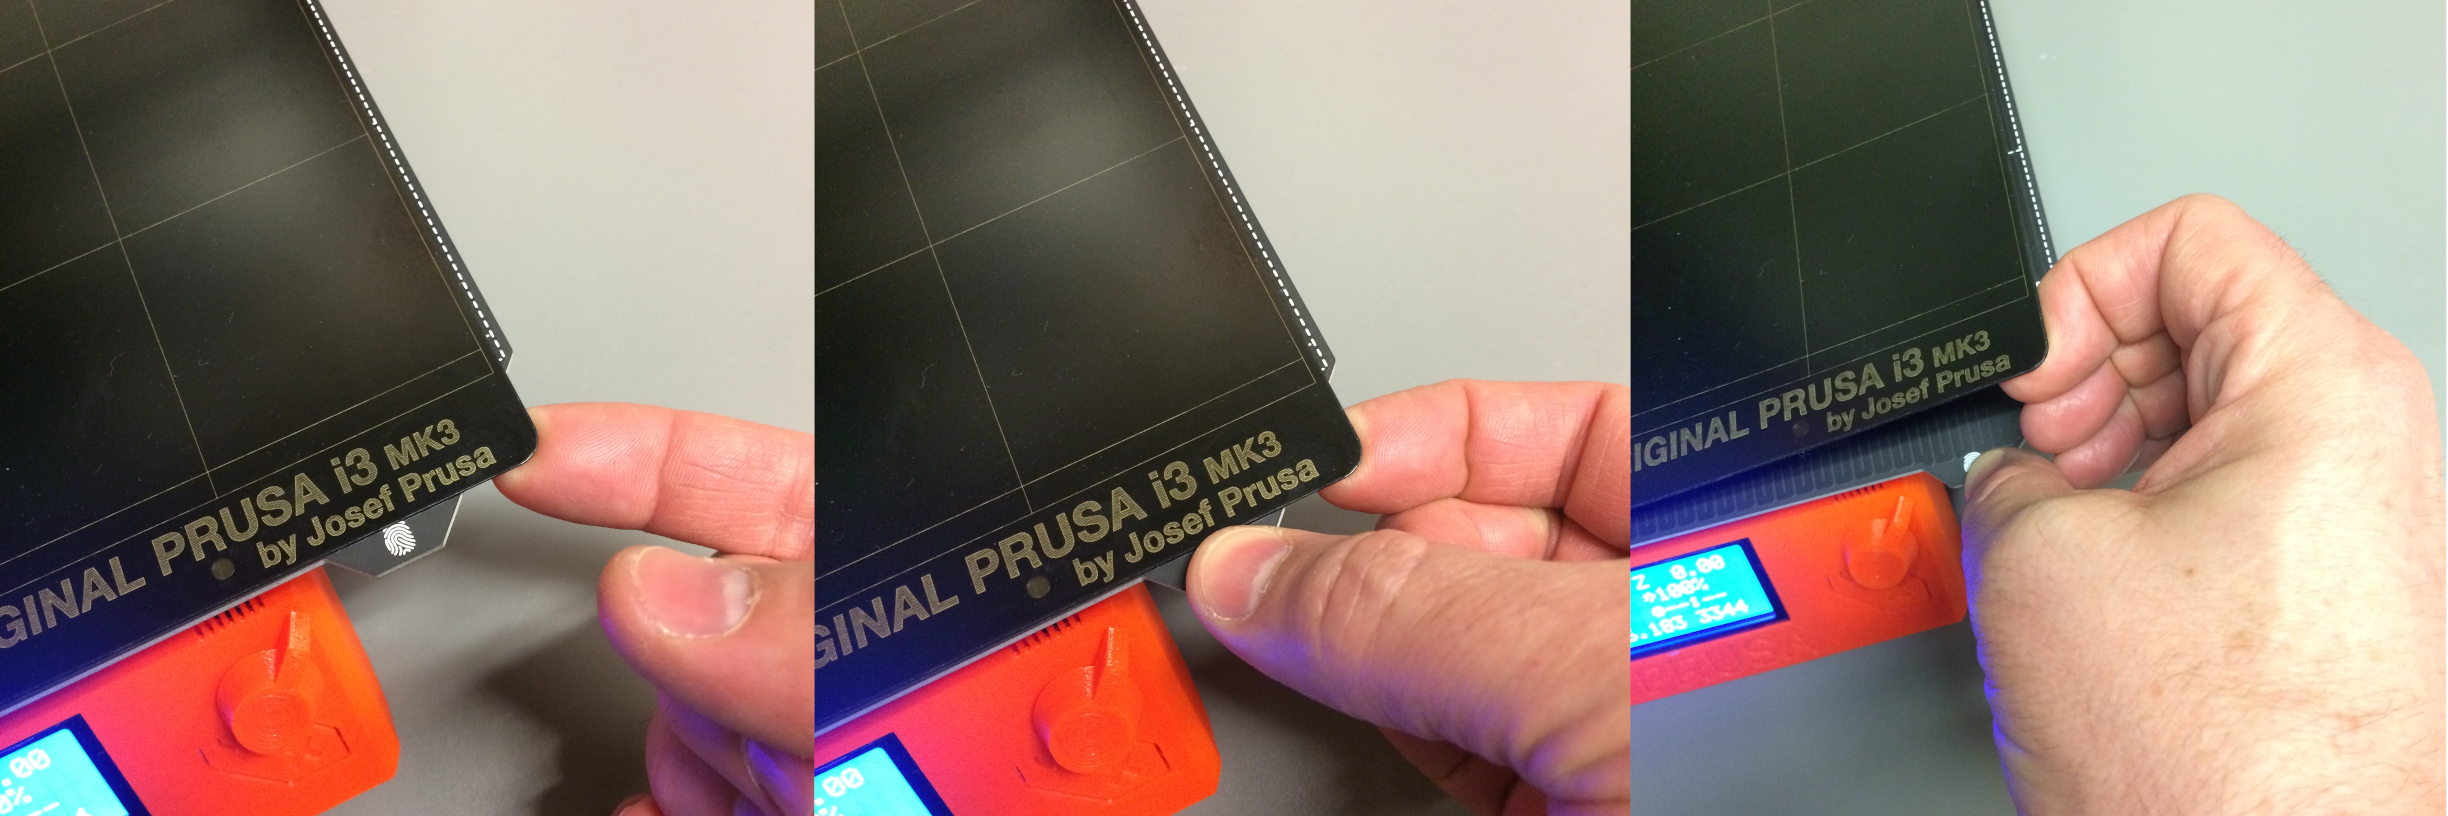
Remove the spring steel heatbed. It's magnetic! See picture below for a good technique. Remove any fused filament from the bed, and clean it with >90% Isopropanol (Isopropyl alcohol - IUPAC name propan-2-ol; commonly called 2-propanol or IPA) and a fresh, disposable lint-free wipe. Don't touch the cleaned print area of the heatbed with your bare hands or anything else.
- Make sure there filament is loaded into the printer.
- Make sure there is enough filament for the job. (An estimate of the required amount of filament is provided by the slicer software)
- If you need to load or change color, see the section Changing filament.
- Click the print button next to your G-code on Repetier.
- The filament and heat bed will automatically be preheated.
- The print job will start once the componenents are at temperature.
- Verify that the print job is starting properly.
- The nozzle will inspect 9 points on the bed for leveling.
- A test strip will be pushed deposited to clean the nozzle.
-
Wait a few layers to be printed to ensure proper adhesion, maximizing chances of a successful print!
Removing print job
- Once the print job has finished, you should remove the spring steel heatbed with the piece still
attached.
- It is attached by magnets. See point 5 in the section Printing above.
- You may need to move the extruder nozzle or stage to better access it, do so by using the mover controls in Repetier.
- Use caution when moving the extruder! Verify, using small steps, which axes and directions in the software correspond to which physical movements in reality!
-
Flex the metal print bed gently towards and then away from the printed part to break the adhesion.
- Then pull the piece off with your hands.
- If there are small and/or thin pieces, you may want to use one of the 3D printed scrapers to help remove them.
-
Make sure all printed pieces and extra material are removed from the printed bed, then clean the print bed with IPA and a fresh wipe for the next person.
-
Replace the bed on the printer.
-
Throw away all scraps.
-
Before leaving you must complete the print summary form here. The link is also available as a QR code on the desk for quick submission via mobile.
Changing filament
Changing the filament is all done on the printer.
All choices and commands are accessed and executed via the main menu and the control knob. Turn to select,
press to initiate.
The button marked with an X immediately below the control knob is not used to cancel a command or go up a
menu level. It is only used to quickly power cycle the printer.
-
Preheat the extruder nozzle to PLA setting.
- If a filament is loaded, select "Unload Filament."
- Follow the instructions, and gently but firmly pull out the filament when it tells you to. Do not jerk the filament. If it doesn't remove completely and easily, seek assistance from the TA or RT.
- Do not let go of the end of the filament! Immediately secure it to the holes in the side walls of the spool. If you let go of the end it may snarl up, which will cause problems for the next person using the spool.
- Never leave the end of the filament hanging loose.
- Select the filament you want to load, and put it on the filament arm above the printer.
- Make sure that the filament is not looped around itself and is snag free. If you are concerned that this happened, come and talk to the TA or Robert Turner.
-
Clip the end of the filament off on an angle such that it has a fresh cleaved end that comes to a point. Throw away all scraps.
-
On the printer select "Load Filament".
-
Follow the instructions, inserting the filament when it tells you to do so.
- The printer will then extrude some filament to clean the nozel, and will ask if the correct color is
printing.
- If yes, press "yes".
- If no, press "no", and it will run some more filament through.
Closing Remarks
Remember, this is a brief outline of the printing procedure. If you have any reccomendations or additions that you think should be made, let us know.
You may encounter some errors while printing (print falls off of heating bed, interruption, broken filament). If these happen, either check the FAQs on the website, or consult the Prusa documentation for the printer. Please inform us of any failed prints and any problems with the printer. We aim to improve the printer services and strive to provide reliable rinting.
Log any issues or any major changes that you make, and stop printing immediately if a serious issue arises. Use software controls to cancel a print job. Do not just turn off the printer as this will stop the cooling fan to the filament, which may overheat.